
| TH-D74A/E TH-D75A/E Virtual COM Port Driver |
January 16, 2024 |
Introduction
Thank you for choosing the KENWOOD transceiver. You can connect your TH-D74A/E or TH-D75A/E to a PC via a USB cable, and then utilize the Frequency Control Programs or Memory Control Programs we have provided.
After reading through the following explanations, feel free to download and install the software.
Operating Environment
1. Operating System (OS)
Windows 10
Windows 11
Notes:
This software is designed to run on the above operating systems.
Applicable operating systems are subject to change without notice due to the end of the technical support by Microsoft Corporation or change of the product specifications.
2. Peripheral Devices
USB 2.0 interface.
Installing the virtual COM port driver
ATTENTION: Do not connect the device to a PC before installing the virtual COM port driver.
1. Extract the downloaded file "USB_CDC_Driver_TH-D75_V100.zip" into a designated folder. In the designated folder, a folder labeled "USB_CDC_Driver_TH-D75_V100" will be created.
In the folder labeled "USB_CDC_Driver_TH-D75_V100", double click the "dpinst.exe" in the folder "x86" with 32-bit OS, or the "dpinst.exe" in the folder "x64" with 64-bit OS.
After a few moments, the following window is displayed.

Click [Next>].
2. The following window is displayed, and the driver installation will begin.
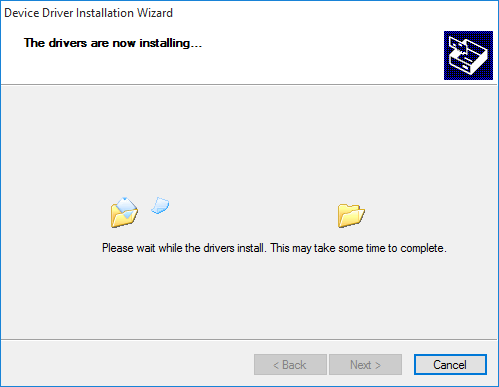
Wait until the installation is completed.
3. After a few moments, the following window is displayed.
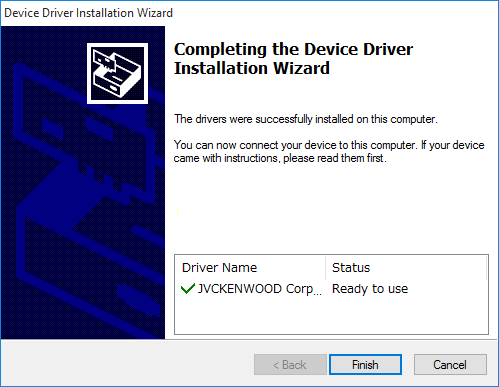
Click [Finish] to complete installation and exit.
Connecting the device to a PC
Turn the transceiver power ON, then connect it to a PC via a USB cable for the transceiver. The PC will detect new hardware.
The installation of the device driver software will start automatically.
If a reboot request appears, please reboot the PC.
Confirming the COM port number
Open the "Device Manager" to confirm which COM port number is assigned for connection with the transceiver.
(Confirm the COM port number after turning on the transceiver and connecting the transceiver to the PC using a USB cable.)
1. Right-click the Windows [Start] button.
2. Click [Device Manager] in the displayed window.
3. [Device Manager] window will appear.
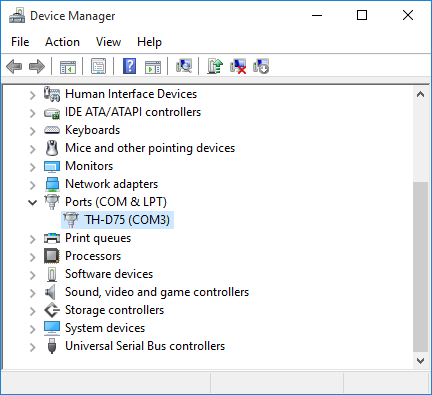
Click "Ports (COM & LPT)" to extend it, then you can find "TH-Dxx (COMxx)". The "COMxx" number is different depending on your PC.
In the above example, "TH-D75 (COM3)" is listed. This means that COM3 is assigned for the connection with the TH-D75A/E.
Select this port number in the configurations for communication in the software you are using.
If you agree with the details listed above, click the following link to download the virtual COM port driver installation program.
"USB_CDC_Driver_TH-D75_V100.zip" 662KB download
Update History
Ver.1.00 (January 16, 2024)
First release. (TH-D74/D75 compatible)
Ver.1.00 (September 16, 2016)
First Release. (TH-D74 only)
Windows®, and Windows logo are registered trademarks of Microsoft Corporation in the United States and/or other countries.